Correcting with PerfectIt Cloud
![]()
Checking for Issues
When you launch PerfectIt Cloud and press the Start button (see Quickstart for more details), PerfectIt gathers information on your document and begins the first check. If it finds an issue, this will be displayed. If it does not, it will automatically start the next check.
When PerfectIt finds a possible issue, you can choose to:
These are each explained below after an explanation of how PerfectIt Cloud displays issues.
Understanding How PerfectIt Cloud Displays Issues Found
PerfectIt finds locations in a document that may contain issues. The way in which these are displayed is shown below:
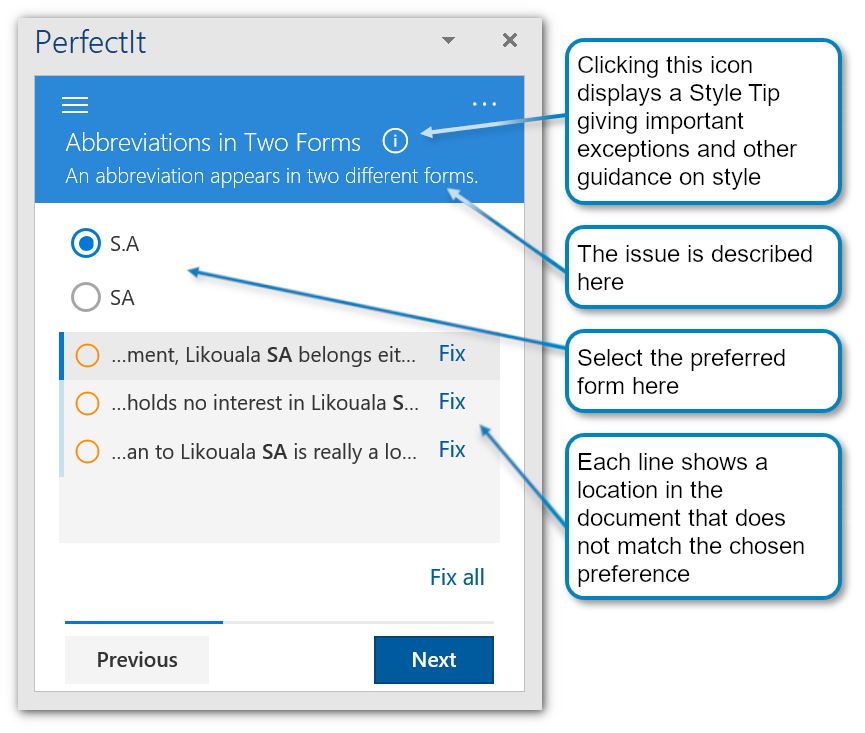
It’s important to remember that PerfectIt is no substitute for human judgement. When PerfectIt suggests that an issue may exist, check the recommendation carefully.
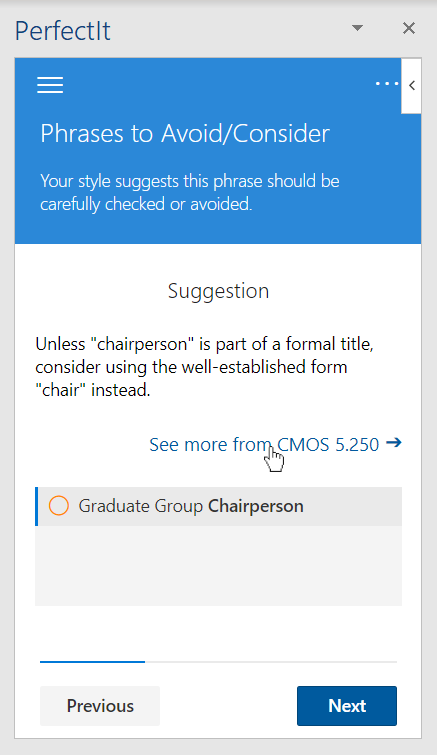
Detailed Explanations
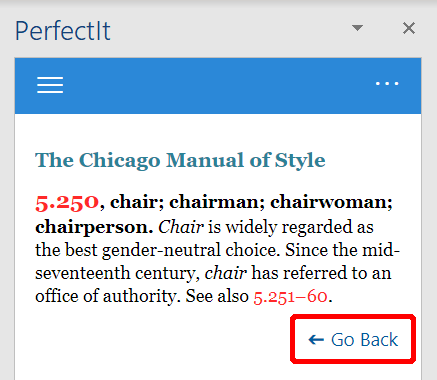
Some issues display further guidance from external sources - a style guide or dictionary, for example. This extra guidance can be viewed by clicking the See more link where available:
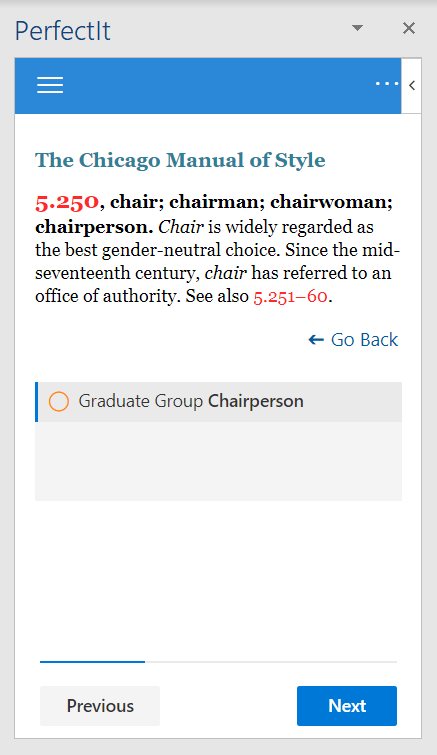
PerfectIt displays the Detailed Explanation:
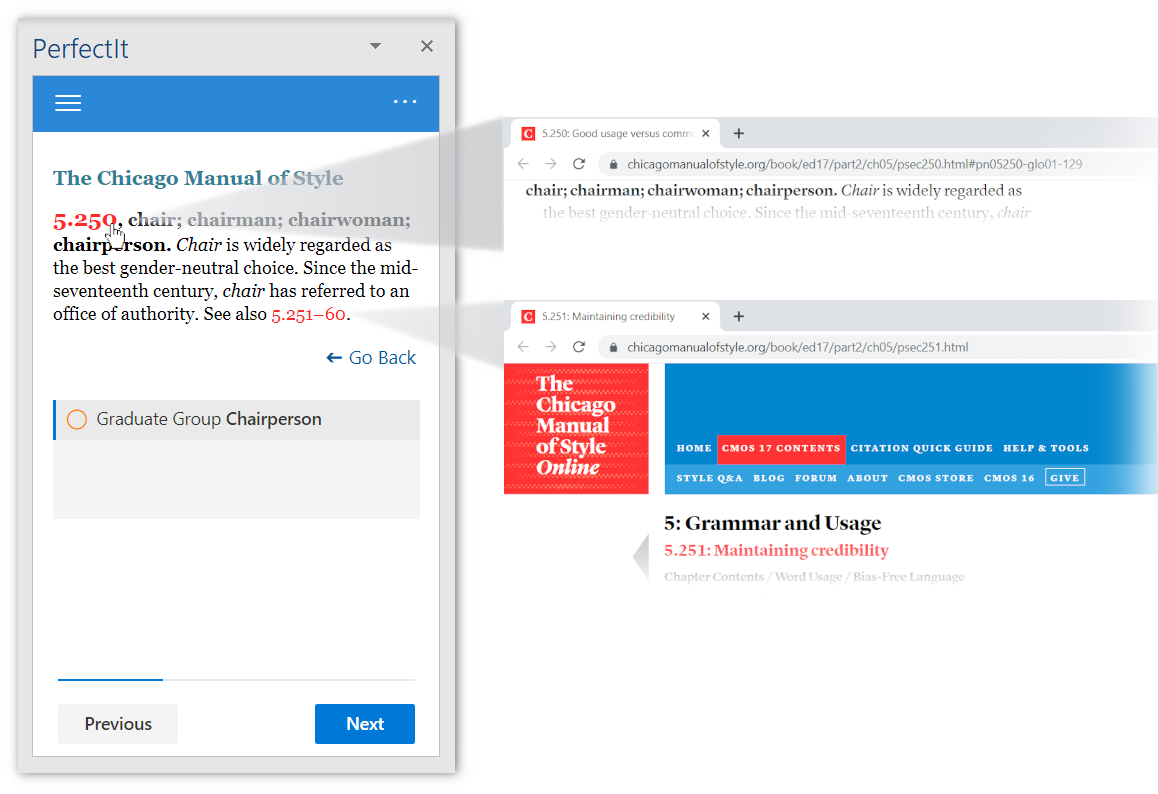
The Detailed Explanation may contain links to the original source of the guidance and additional information. Clicking one of these links will open the relevant page in your web browser, allowing you to easily switch back to your document and PerfectIt.
To close the Detailed Explanation view, click Go Back in the bottom right corner:
Fixing an Issue Automatically
With most (though not all) checks, PerfectIt can replace text automatically with the Fix button. To make the change automatically:
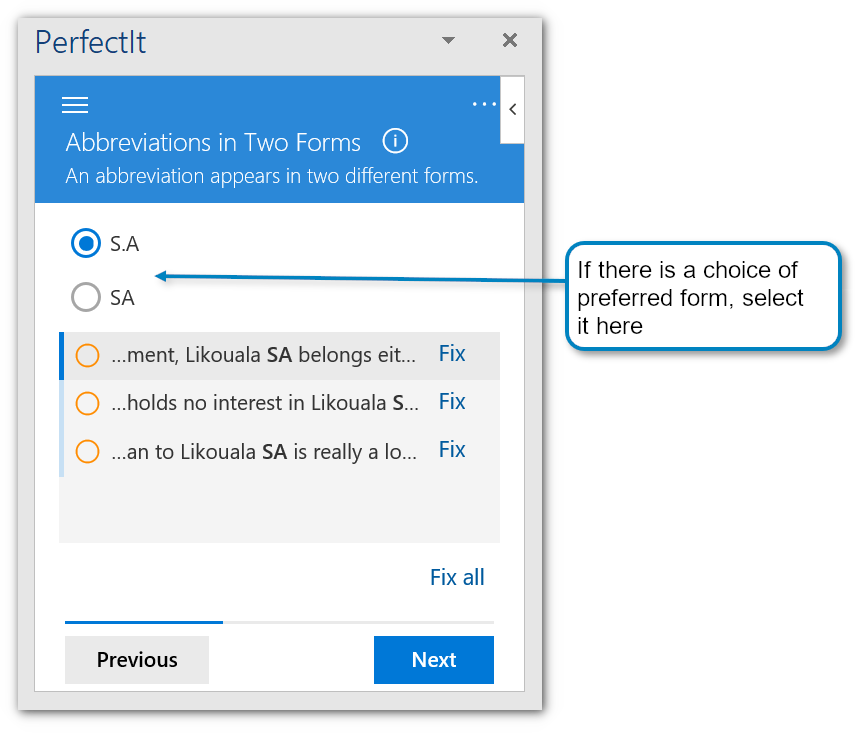
Where applicable, choose the preferred form.
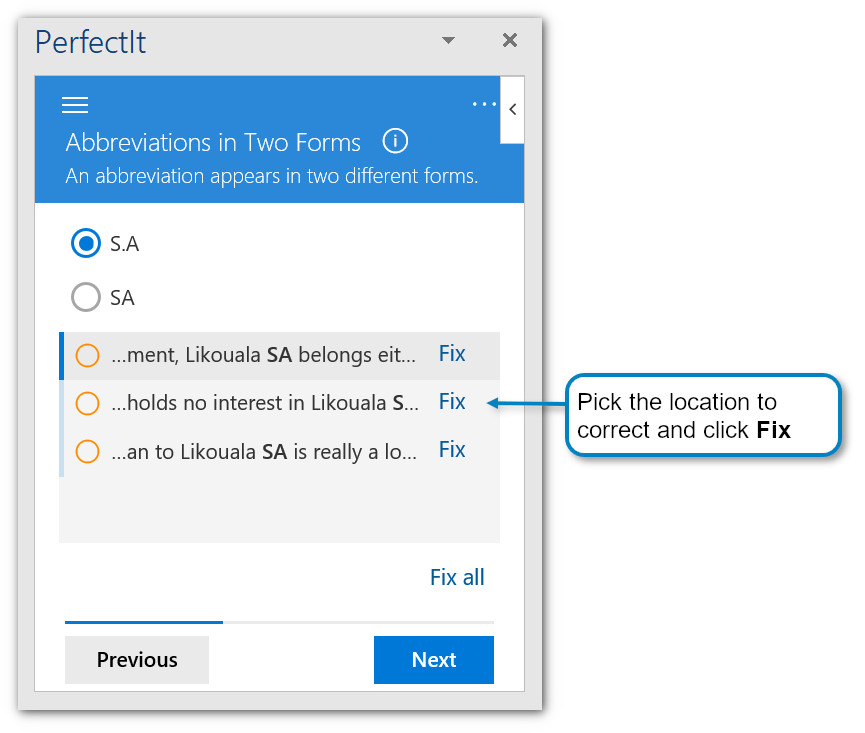
Choose the location.
Click Fix.
These steps are shown below:
For some checks, you can select the preferred form.
Pick the location to correct (PerfectIt Cloud can display up to 50 locations) and click Fix.
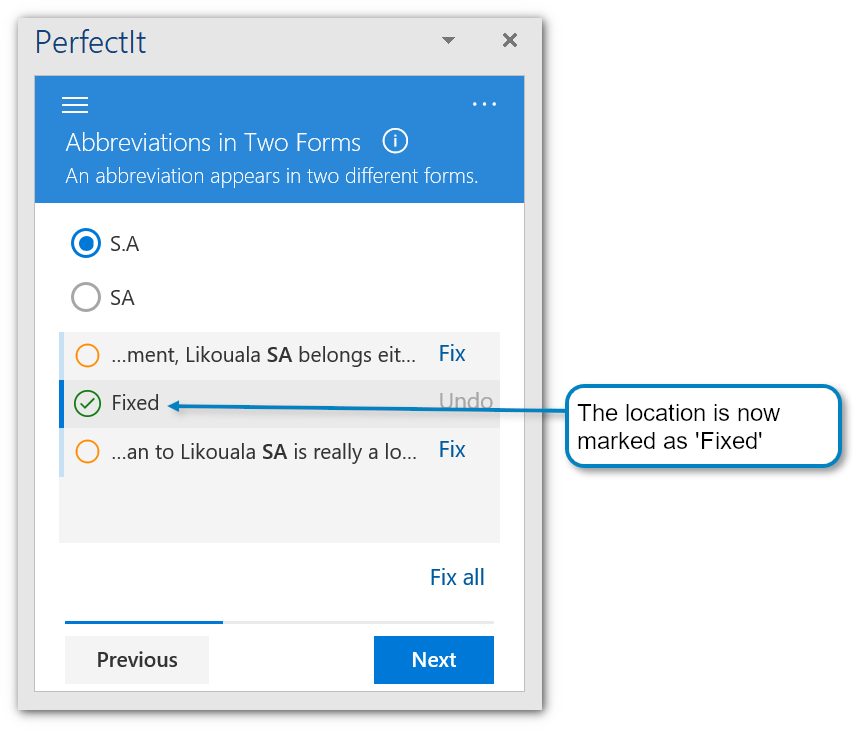
PerfectIt will make the change in the document and display the word ‘Fixed’ in the box representing that location, as shown below.
Fixing All Issues Automatically
If you are confident that an issue should be corrected at all locations within a document, you can click Fix All to correct these.
Caution
This option should be used with caution since it does not provide the opportunity to check each location carefully.
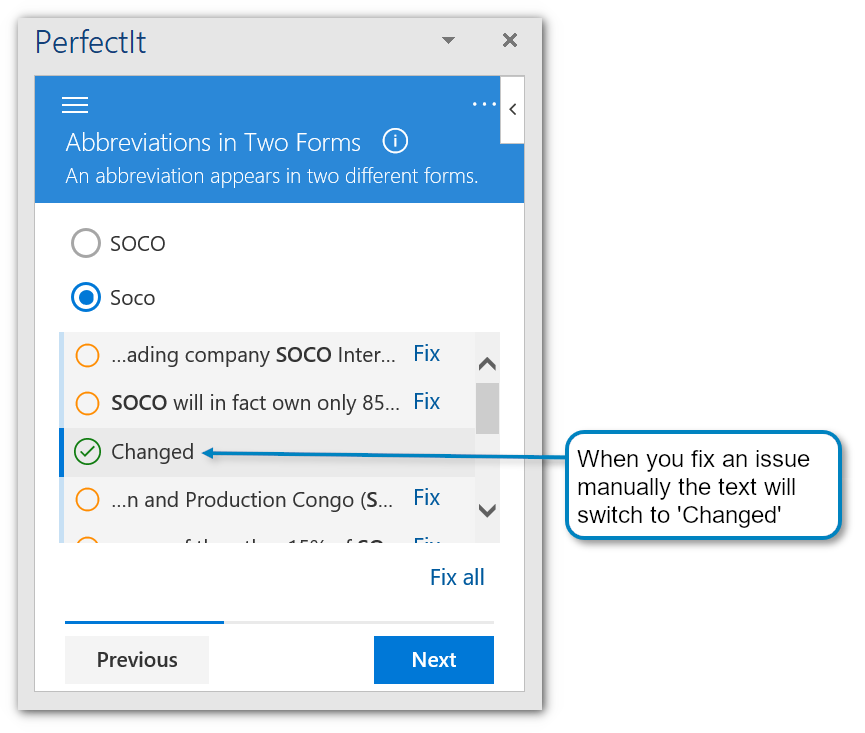
Fixing an Issue Manually
At any time, it is possible to fix an issue identified by PerfectIt by clicking within the document and editing the text using Word. When you are finished, you can continue to use PerfectIt normally. Any issue that has been corrected manually will display the text ‘Changed’ in the location list, as shown below:
Once an issue has been altered manually, it can only be changed by editing the Word document directly. It cannot be altered using PerfectIt’s Undo or Fix buttons.
Undoing an Issue Fix
If you wish to undo a change made with PerfectIt, click Undo next to the location. It is also still possible to fix changes manually in Word while PerfectIt is running.
Finding Another Issue
When you have finished correcting issues, you can advance to the next issue by clicking the Next button, explained in more depth in Checking for More Issues.
Note
These instructions are for users running PerfectIt Cloud. If you’re using PerfectIt 5 on a PC see Correcting with PerfectIt 5.